I started this dress a while ago and finished it Christmas Eve. I thought if my girls get to wear a new dress to church on Christmas, then I should finish up this dress so I can wear one, too.
I used McCalls 5893
but modified it to come up with this:
The only problem is that when I took my measurements to cut it out, I was a bit smaller, so I feel a bit cramped in the bust. Oh well. Maybe I can wear it after I'm done nursing if it's not too big. Oh, and I forgot to show the picture with the sleeve! The sleeve is a straight 3/4 sleeve, but I put kind of a bell-cuff on it that goes to my wrist bones.
Sunday, December 25, 2011
Wednesday, December 21, 2011
Wood Floor Cleaner
I've heard you can make your own hardwood floor cleaner. I hope it's true because I just made some and tried it. I found that you can mix 1/2 C white vinegar with a gallon of water. I broke that down to 1 T white vinegar with 2 C water. I read somewhere else that you can mix 1/4 C vinegar to 30 oz water. That breaks down to approximately 2 T vinegar with 2 C water. I thought I'd try the lesser amount of vinegar, though, this time. It seemed to work very well. I just sprayed the cleaner on the floor and wiped it off with an old terry-cloth towel.
I also read somewhere that you can make your own hardwood floor polish from 1/2 C vegetable oil with 1/2 C white vinegar. I want to research it just a little more, though, because I'm a little worried about putting that much vinegar on the floor!
*** Apparently you're not supposed to use vinegar or oil soaps on Bruce hardwood flooring, which this is because it ruins the finish. Oh well, guess I won't use it anymore. I've probably already ruined the finish, though, by using my Murphy oil soap. Guess it doesn't help having little kids either....
Sunday, December 18, 2011
Monday, December 12, 2011
Neighbor Gifts - Minty Hot Cocoa Mix
I love neighbor gifts. I think they're fun. I like to give them, and I like to get them. I really enjoy nice, little things and feel a bit bad when people give really nice things. I like the gifts mainly for the neighborly socialization -- to let people know you care and appreciate them.
This year, I thought I'd go really easy and just make some hot cocoa mixes. I'm going with 2 recipes. I adapted them from the one in the December 2011 Friend Magazine.
Minty Hot Cocoa
(just add water)
1 C powdered milk
1 C powdered sugar
1/4 C cocoa powder
1-2 drops peppermint oil
Add 8 oz. hot water to 1/2 C mix.
Minty Hot Cocoa
(just add milk)
1 C powdered sugar
1/4 C cocoa powder
1 T coffee creamer
1-2 drops peppermint oil
Add 6 oz. hot milk to 1/4 C mix.
Tuesday, December 6, 2011
Sunday, November 20, 2011
Homemade Crayons from Molds
I didn't think this project would be blog-worthy, but we learned a couple things I wanted to jot down...
I mainly used Ashley's instructions from Make It and Love It (broke crayons in molds and melted in the oven at 250 -- but ours took A LOT longer for some reason - 20-30 minutes?); let the melted crayons sit for a few minutes; then we put them in the freezer like Jill said from Homemade by Jill.
The funny thing was, we mixed our broken Crayola and Prang crayons with some of our junky crayons from the dollar store and restaurants. It was interesting because the different consistencies separated! So, there's a layer of wax with basically no color on one side of the crayon, and very nice color on the other! How funny! I thought the different crayons would mix and we'd get a mediocre crayon.
Monday, October 31, 2011
Mummy Costume
My son wanted to be a mummy for Halloween, and I found this great video on YouTube.
I thought it would be easier to start more from scratch, though.
I found a pattern for loose pants (actually from an Indian costume), used white flannel, tore strips of muslin, and sewed them on, but not to the top of the pant, just to the crotch.
Then I sewed the legs together and the crotch seam.
Then I sewed strips all around the hips so that the front/rear seams would be covered. Then I made a casing for the elastic and hemmed the pants.
I really wanted a white turtleneck, but couldn't find one anywhere! Finally I just got one of my old long-sleeved white t-shirts, cut it up the back, took a couple inches out, then sewed it back up. I also chopped the sleeves a little shorter.
I sliced the arms open like this so it would be easy to sew on the strips of muslin.
I sewed the muslin strips all the way up to the arm-pit on both the arms and the body. Then, I stitched the arms back up and sewed the remaining strips over the shoulder/neck area on by hand.
We just wrapped more strips around his head. I'm sure it's a safety hazard.
Sunday, August 28, 2011
My Body Is a Temple of God Primary Talk
OK, ok, so I know this isn't crafty at all, and I've posted stuff like this on my personal/family blog before, but then I realized, if someone wants an idea for an LDS Primary talk, why not share it? I got all these ideas on line, so if you are searching, you'll probably run across them, too (I should have saved my sources, but didn't, sorry!). My 8 y.o. son used this outline for his talk.
Cars - are different (show cars)
Our bodies are like temples, too
Cars - are different (show cars)
- Fast/slow
- Red, blue, gold, silver
- Big/small
- Small/big (Kirtland/Nauvoo)
- White/gray (DC/SLC)
- Taller/shorter
- Baptisms for the dead (show picture of font)
Our bodies are like temples, too
- Smaller/bigger
- Lighter/darker
- Faster/slower
- But - we all have the Spirit of God, too
- Physical
- Exercise
- Good hygiene (bathe, brush hair, trim nails, brush teeth)
- Be modest
- Eat healthy and obey the Word of Wisdom
- Spiritual
- Exercise faith
- Keep thoughts clean by reading, watching, and listening to good things.
- Feed your Spirit through prayer and scripture study.
- Age 9
- Milked 2-9 cows/day
- Boring
- Make it good and fun
- Squirt milk to cats
- Memorized Articles of Faith, 10 Commandments, Hymns (sang to the cows)
Sunday, August 14, 2011
Simple Indiana Jones Birthday Party Ideas
For our son's 8th birthday, he wanted an Indiana Jones party. Since I knew adventure and gore was up my husband's sleeve, I thought I'd just let him take over. I did some initial research, some shopping at the dollar store, then he put it all together. He did a great job. There is tons and tons of stuff on Indiana Jones b-day parties out there, and some people go all out. That's not really my style, especially with 3 kids and one on the way and a super-busy summer, but here are our ideas.
Each of the clues was printed on a paper using Papyrus font. We could have burned the edges or printed on cool paper, but just ran out of time. The first clue was switched to Wingdings font that they each had to decode a piece of the clue with a key then put it together like a puzzle. That took about 20 minutes.
1.
Welcome adventurers! I need your help recovering the Golden Skull of the Amazon. It’s hiding in the Arc of the Covenant which you will need to find. There will be a lot of challenges along the way and you’ll need to be brave and smart, but I think you can do it. The first clue is found at the end of boulder canyon. Be careful it’s a dangerous journey. You must all cross boulder canyon before
going onto the next clue.
Your friend,
Indiana Jones
2.
Good job adventurers! You made it past boulder canyon. The next clue is on the other side of a deep canyon. You will have to cross over an old bridge. You’ll have to be careful around the canyon lives a tribe of head-hunting amazon men who would love to knock you off the bridge with
their poison darts.
Indiana Jones
3.
Adventurers. You must now cross the white sands desert for the next clue. Make sure you drink plenty of water at any oasis that you find. On the other side of the desert look for the next clue in the treasure chest.
Indiana Jones
4.
Danger Adventurers! We’ve just learned that an enemy has poisoned the white sands desert water. Your lives are in danger. You must find an antidote soon or the poison will kill all of you. Unfortunately the only antidote is to eat the raw guts of an Amazon Tree Rat. Find the nearest tree and look for a tree rat. When you find it cut off his head and eat the guts. This will cure you so you can go onto your next clue.
Indiana Jones
5.
Good job Adventures, you survived the poisoning. You must now find the cursed mummy skull. Many years ago, grave robbers stole the head of an ancient Egyptian mummy and buried it under a cross in the mountains. You must find the cross and dig up the mummy’s head. Inside its skull you will find the clue that will lead you to the Arc of the Covenant which contains the Golden Skull of the Amazon.
Indiana Jones
6.
Now onto the Arc of the Covenant. I don’t have a lot of information on where to find the Arc, but it is rumored to be deep in the Amazon jungle. Go find the jungle and crawl through the trees until you see the Arc. Inside the Arc is the Golden Skull of the Amazon. Good luck Adventurers.
Indiana Jones
7.
Great job Adventures, you found the golden skull! Take this skull back inside and you can sell it for a bag of treasures for each of you.
You were all excellent!
Indiana Jones
Some stuff from the dollar store. I did buy the gold paint at Michaels. |
Decoding the first message. |
Welcome adventurers! I need your help recovering the Golden Skull of the Amazon. It’s hiding in the Arc of the Covenant which you will need to find. There will be a lot of challenges along the way and you’ll need to be brave and smart, but I think you can do it. The first clue is found at the end of boulder canyon. Be careful it’s a dangerous journey. You must all cross boulder canyon before
going onto the next clue.
Your friend,
Indiana Jones
I read online that some people painted their beach balls; we obviously didn't. |
Finding the next clue. |
2.
Good job adventurers! You made it past boulder canyon. The next clue is on the other side of a deep canyon. You will have to cross over an old bridge. You’ll have to be careful around the canyon lives a tribe of head-hunting amazon men who would love to knock you off the bridge with
their poison darts.
Indiana Jones
Yes, if these boys didn't know about spit-wads before, they do now! |
3.
Adventurers. You must now cross the white sands desert for the next clue. Make sure you drink plenty of water at any oasis that you find. On the other side of the desert look for the next clue in the treasure chest.
Indiana Jones
I used clear Kool-Aid for the poisoned water. I put their names on the cups so we could re-use them when we ate b-day pie. |
4.
Danger Adventurers! We’ve just learned that an enemy has poisoned the white sands desert water. Your lives are in danger. You must find an antidote soon or the poison will kill all of you. Unfortunately the only antidote is to eat the raw guts of an Amazon Tree Rat. Find the nearest tree and look for a tree rat. When you find it cut off his head and eat the guts. This will cure you so you can go onto your next clue.
Indiana Jones
"Catching" the tree rat, ripping off his pre-cut head that had been sort-of super-glued back on and tossing the guts (Starbursts) down to the kids. |
5.
Good job Adventures, you survived the poisoning. You must now find the cursed mummy skull. Many years ago, grave robbers stole the head of an ancient Egyptian mummy and buried it under a cross in the mountains. You must find the cross and dig up the mummy’s head. Inside its skull you will find the clue that will lead you to the Arc of the Covenant which contains the Golden Skull of the Amazon.
Indiana Jones
6.
Now onto the Arc of the Covenant. I don’t have a lot of information on where to find the Arc, but it is rumored to be deep in the Amazon jungle. Go find the jungle and crawl through the trees until you see the Arc. Inside the Arc is the Golden Skull of the Amazon. Good luck Adventurers.
Indiana Jones
My husband had tied a fishing line to the golden skull to fling it out at the kids when the lifted the box, but it didn't quite work. |
7.
Great job Adventures, you found the golden skull! Take this skull back inside and you can sell it for a bag of treasures for each of you.
You were all excellent!
Indiana Jones
All this took about an hour. We were also going to have the kids make snakes out of pretzel dough, but forgot!
Tuesday, May 31, 2011
Paper Dolls
My daughter and I spent a lot of time today printing and cutting out paper dolls. We really liked this free site: http://www.100megsfree4.com/gogators4/Index.html
Wednesday, March 30, 2011
T-Shirt Dress
During nap time today I converted one of our school T-shirts into a toddler dress! So fun! I used Liz Clark's infant gowns pattern, too! She specializes in mid-1800 clothing, but, hey, it works for this, too!
Friday, March 4, 2011
Mixes, Mixes, Mixes
I had so much fun making mixes yesterday!
I ground my wheat then made cornbread, pancake, waffle, and a no-bake cookie mix (we'll see if it's worth it to make that mix, because it already has too many steps!)
Usually I put my mixes in yogurt cartons and store them in the fridge (because of the whole wheat), but I though I'd try baggies this time. I wrote my add-ins on the bags and plan to save the bags to re-fill later.
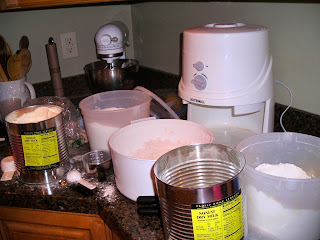
To bad my kitchen was left like this!
Waffles (variation from BHG Cookbook):
1 3/4 C WW flour
1-2 T sugar
1 T baking powder
1/4 t salt
Very heaping 1/4 C dry powdered milk (or however much you need to equal 1 3/4 C milk depending on your dry milk product)
When ready to use, add:
2 eggs, beaten
1/4 - 1/2 C oil
1 t vanilla
1 1/2 - 1 3/4 C water (depending on how runny you want your batter)
Pancakes (variation from BHG Cookbook):
1 3/4 C WW flour
1-2 T sugar
2 t baking powder
1/2 t baking soda
1/4 t salt
Heaping 1/4 C dry powdered milk (or however much you need to equal 1 3/4 C milk depending on your dry milk product)
When ready to use, add:
1 egg, beaten
1 1/2 C water
3 T oil
Any mix-ins (fruit)
Cornbread (variation from BHG Cookbook):
3/4 C white flour
1/4 C WW flour
3/4 C corn meal
2 - 3 T sugar
2 1/2 t baking powder
3/4 t salt
When ready to use, add:
2 eggs, beaten
1 C water
1/4 C oil
Spray 8x8 dish, bake at 400 for 15 - 20 minutes.
Thursday, January 27, 2011
Neti Pot Salt Solution
I realize this is quite a personal subject, one that I shouldn't share with the world, but I started using a Neti Pot. If you don't know what that is, it's a little pot you fill with warm salt water, you stick it in one nostril and pour the water through your nose out the other nostril. The pediatrician said they can really help, so I've been using it when I have a cold or when I'm stuffy. I have serious stuffy nose problems and always seem to catch colds, and I've been doing so much better since using the Neti Pot.
My starter kit came with 30 or 40 or something salt packs. They're all gone, but there's NO WAY I'm paying for new salt packs. I got on line to see what I could put in my salt solution. I got all sorts of ideas:
Now all I do is scoop out a little less than 1/4 t of salt/soda, put it in my Neti Pot, fill it with warm water, and ta-da! I can breathe again!
More info on using the Neti Pot.
My starter kit came with 30 or 40 or something salt packs. They're all gone, but there's NO WAY I'm paying for new salt packs. I got on line to see what I could put in my salt solution. I got all sorts of ideas:
- 1 t finely ground uniodized salt with 1 C water
- 1/2 t baking soda with 1 t uniodized salt in 2 - 3 C water
- 1/8 t salt with 8 oz non-chlorinated, boiled water
- 3 parts salt to 1 part baking soda
- 1/8 t salt to 1/2 C water
- 1/4 t salt, 1/4 t soda, 1/4 t glycerine
- 1/2 t, 1 C water
- 1/4 t salt, 8 oz. boiled water
Now all I do is scoop out a little less than 1/4 t of salt/soda, put it in my Neti Pot, fill it with warm water, and ta-da! I can breathe again!
More info on using the Neti Pot.
Monday, January 17, 2011
New Purse
I've been using one of my experimental diaper bags as a purse for a long time now (kinda pathetic, I know, but I really just don't care -- I'm just not that fashionable). Finally, I figured out what I really wanted and made this bag. I wanted something that I could cross over my shoulder because the short handled bags just keep slipping off my coat during the winter! That's just too much of a pain when I'm carrying little ones! I also wanted a bag big enough to slip a notebook in, or a diaper, or a camera, or whatever depending on the situation. I made it basically like my haversack/possibles bag, but lined and an inch bigger on all sides.
Thursday, January 6, 2011
White Trash Coupon Holder
I'm really not a couponer. I've tried and tried and tried, but it just doesn't happen. I want to use my local grocery store coupons at least, and I was tired of losing them and dropping them, so I came up with this before I went to the store today.
At first I thought I'd just fold papers together in an accordion-style fashion. Then I had a better idea. I'd use the brochure from our rec. center for my foundation!
I folded the front cover in half -- down to the staples, then I folded and taped several of the pages down, but sticking up about a half an inch above the cover. I pulled out a few excess pages in the center of the brochure. Then I wrote my categories on each folded flap and cut away the excess paper to create tabs.
It might be fun to print out the same idea on card stock, but I'll save that for another day. I could even make a fabric cover -- or at least cover it with Contac paper. . . . The possibilities are endless!! ;-)
Subscribe to:
Posts (Atom)